
NEW POST!!!
To quote noystoise…
wow, its been a long time since i have posted anything here.
It has been ages since my last post. So much has happened (Including planning a wedding and getting married). With that said, I have still been circuit bending and building things.

Recently, I purchased an Arduino Uno micro-controller. This thing is awesome. It doesn’t have much to do with true circuit bending (I know someone will have a problem with that) but it is insanely powerful.
Here is what I have been playing around with in the last few weeks.
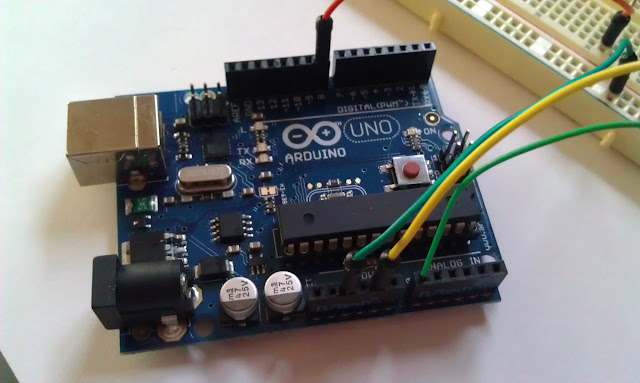
This little Arduino Sequencer project that I have been working on is super simple to build. Really all you need is an Arduino Uno (and a computer to program it with), breadboard, speaker, potentiometer (any value) and some wires.
All of the functionality comes from the programming. The code is simple too. Basiclly, you use the built in tone generator (it’s just a square wave generator) to read the value of a potentiometer and place the value of that the potentiometer into a variable. Then you play a tone based on that value, pause, play another tone, pause, play another, etc.
The subsiquent tones are based off the original tone, they are just multiples of that first value.
The program loops and starts all over again. That’s it!
Here is the link to the tutorial that I followed originally. It has some schematics and in depth instructions about how to set it up and how the code works.
Arduino Tone Follower Tutorial
Here is the code:
/*
SecondHandSynth Digital Arduino Sequencer
https://secondhandsynth.wordpress.com/Plays a pitch that changes based on a changing analog input
circuit:
* 8-ohm speaker on digital pin 8
* Breadboard
* Some resistors and wireThis example code is in the public domain.
Original code before modification came from
http://arduino.cc/en/Tutorial/Tone2*/
void setup() {
// initialize serial communications (for debugging only):
Serial.begin(9600);//boot up sound
int var = 100;
while (var < 500)
{
tone(8, var, 50);
delay(150);
var=(var+80);
}}
void loop() {
// read the sensor:
int sensorReading = analogRead(A0);
int delayTime = 175;
int durationTime = 5000;// print the sensor reading so you know its range
Serial.println(sensorReading);// map the pitch to the range of the analog input.
// change the minimum and maximum input numbers below
// depending on the range your sensor's giving:
int thisPitch = map(sensorReading, 0, 1023, 50, 2000);// print the mapped range
Serial.println(thisPitch);// play the pitch:
tone(8, thisPitch * 2.5, durationTime);
delay(delayTime);
tone(8, (thisPitch * 2), durationTime);
delay(delayTime);
tone(8, (thisPitch * 1.5), durationTime);
delay(delayTime);
tone(8, (thisPitch), durationTime);
delay(delayTime);//second string
thisPitch = thisPitch * .5;tone(8, thisPitch, durationTime);
delay(delayTime);
tone(8, (thisPitch * 1.5), durationTime);
delay(delayTime);
tone(8, (thisPitch * 2), durationTime);
delay(delayTime);
tone(8, (thisPitch * 2.5), durationTime);
delay(delayTime);//second string
thisPitch = thisPitch * 1.5;tone(8, thisPitch, durationTime);
delay(delayTime);
tone(8, (thisPitch * 1.5), durationTime);
delay(delayTime);
tone(8, (thisPitch * 2), durationTime);
delay(delayTime);
tone(8, (thisPitch * 2.5), durationTime);
delay(delayTime);//second string
thisPitch = thisPitch * .5;tone(8, thisPitch, durationTime);
delay(delayTime);
tone(8, (thisPitch * 1.5), durationTime);
delay(delayTime);
tone(8, (thisPitch * 2), durationTime);
delay(delayTime);
tone(8, (thisPitch * 2.5), durationTime);
delay(delayTime);}
Try it out for yourself and let me know how it works. If you have any questions, don’t hesitate to ask.
Thanks for reading and HAPPY BENDING!
